Fixing test cases
Overview
When a test case takes a wrong turn, you can provide feedback to the relevant agents to get it back on track. Feedback can be provided in two distinct scenarios: while the test is still generating, or after it has been fully generated.
Scenario 1 : Correcting a test during generation
If you notice an issue while the test is still being generated:
- Click Cancel to stop generation.
- Identify the last logically correct step — call it step N.
- Click Edit on step N+1 (the first incorrect step).
Rule of thumb: The step to edit is always N+1 — the first step that went wrong, not the last step that was correct.
All steps after N are deleted when feedback is submitted. A new step N+1 is generated based on your feedback, and agents continue generating from there.
Note on greyed-out steps: Greyed-out steps are ones the agent attempted but did not complete successfully. They are shown for reference only — to illustrate the agent's thinking and assist debugging. They are not part of the test and are excluded from the final script.
Scenario 2 : Adjusting a completed test
If a test has already finished generating and needs changes:
- Locate the step that needs updating.
- Edit that step's instruction directly.
Example: If step 15 should select "No" instead of "Yes", edit step 15's instruction accordingly.
All steps after the edited step are discarded and regenerated. Steps before it are unaffected.
⚠️ Important: When a step is edited, the agent re-executes all prior steps before processing your feedback. This ensures stability, but means edits can take anywhere from a few seconds to several minutes depending on how many steps precede the edited one.
Feedback types & actions
1. Improve or rework test instructions
If the original test instructions were unclear or incomplete, revise them and regenerate — or duplicate the test and alter the instructions for greater clarity.
2. Correct a step that has gone off course
If the overall test instructions are fine but one step's logic has drifted:
- Edit the instruction for that step to guide the agent back.
- All steps after that step will be truncated and regenerated.
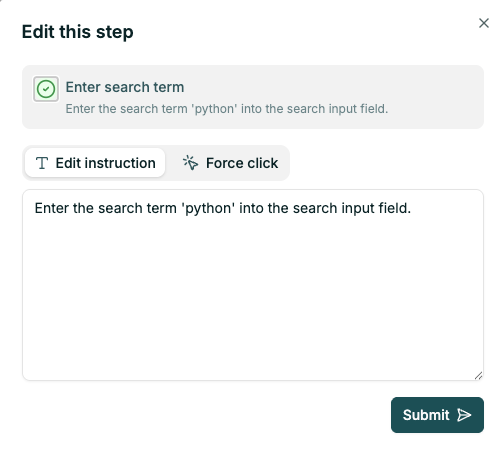
To edit a step:
- Expand the step.
- Click Edit step.
- Modify the step instruction, or choose Force click (see below).
- Click Submit to trigger regeneration from that step.
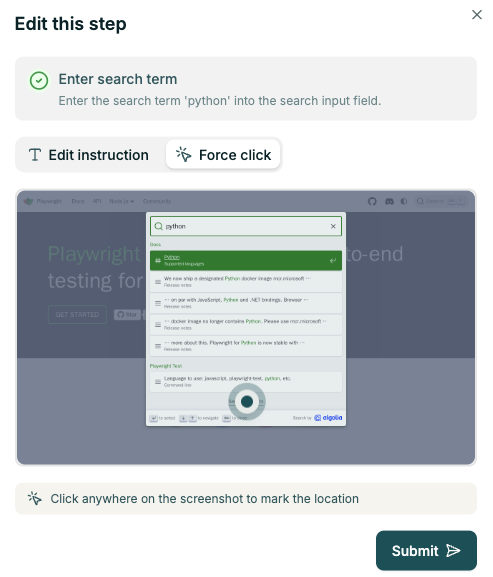
3. Force click
A quick, low-code way to correct an interaction when the agent is clicking the wrong element. Force click lets you point directly to the correct element, which is then converted into a stable locator.
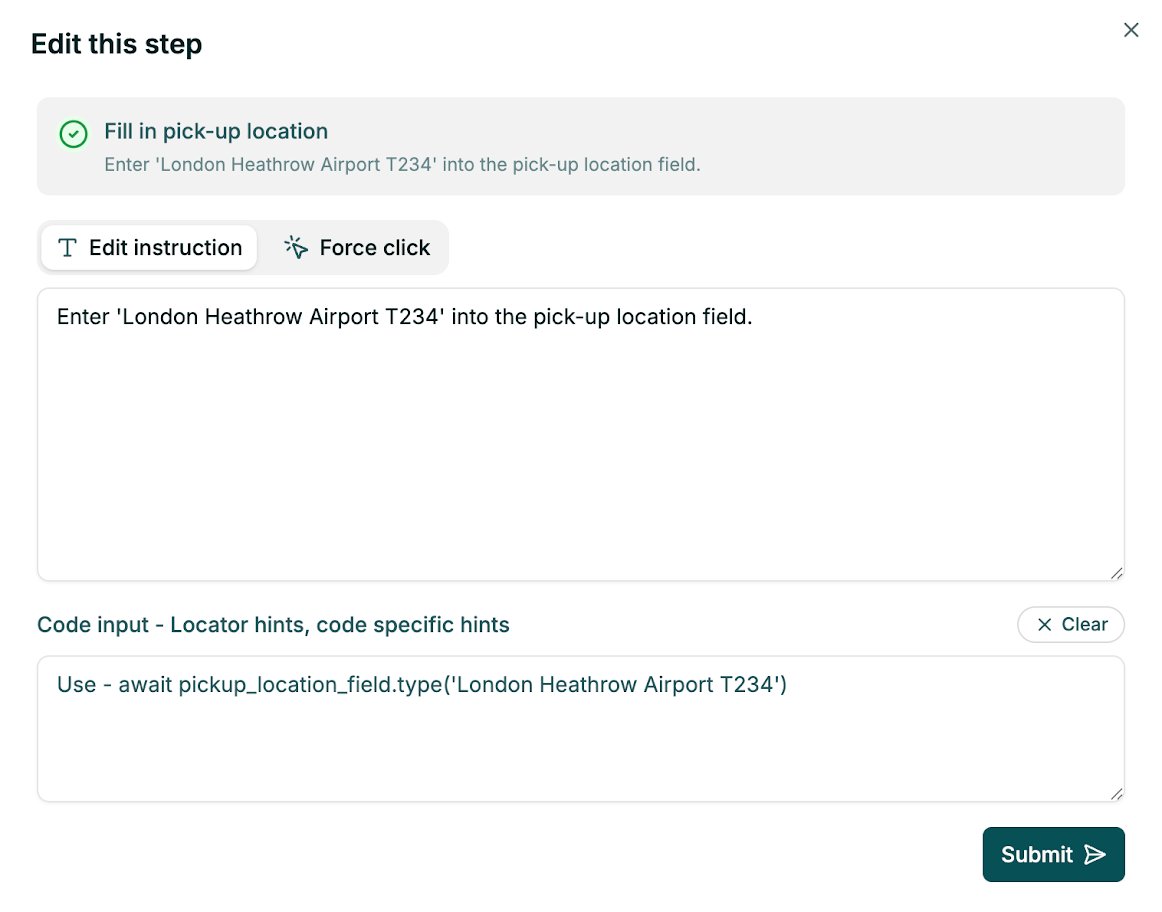
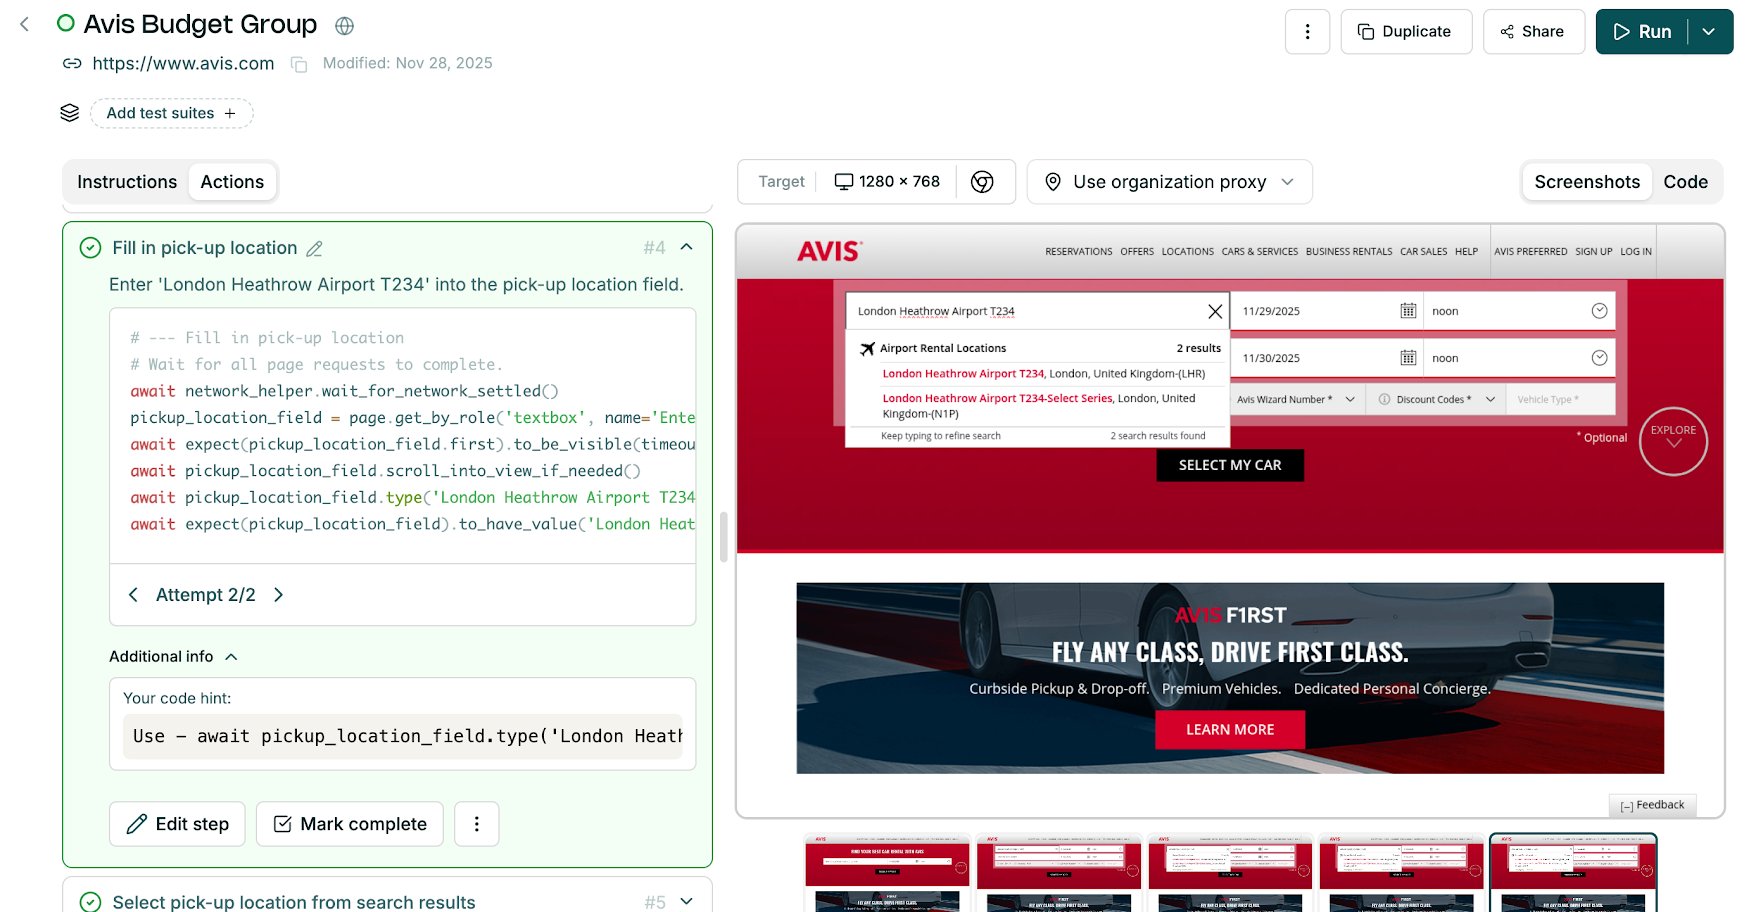
4. Coder hint
Use this when the step instruction is correct, but the generated code is doing the wrong thing — for example, using fragile locators, failing to find an element, or needing pseudo-code logic.
Enter a code hint in the Code input field to guide the code agent directly.
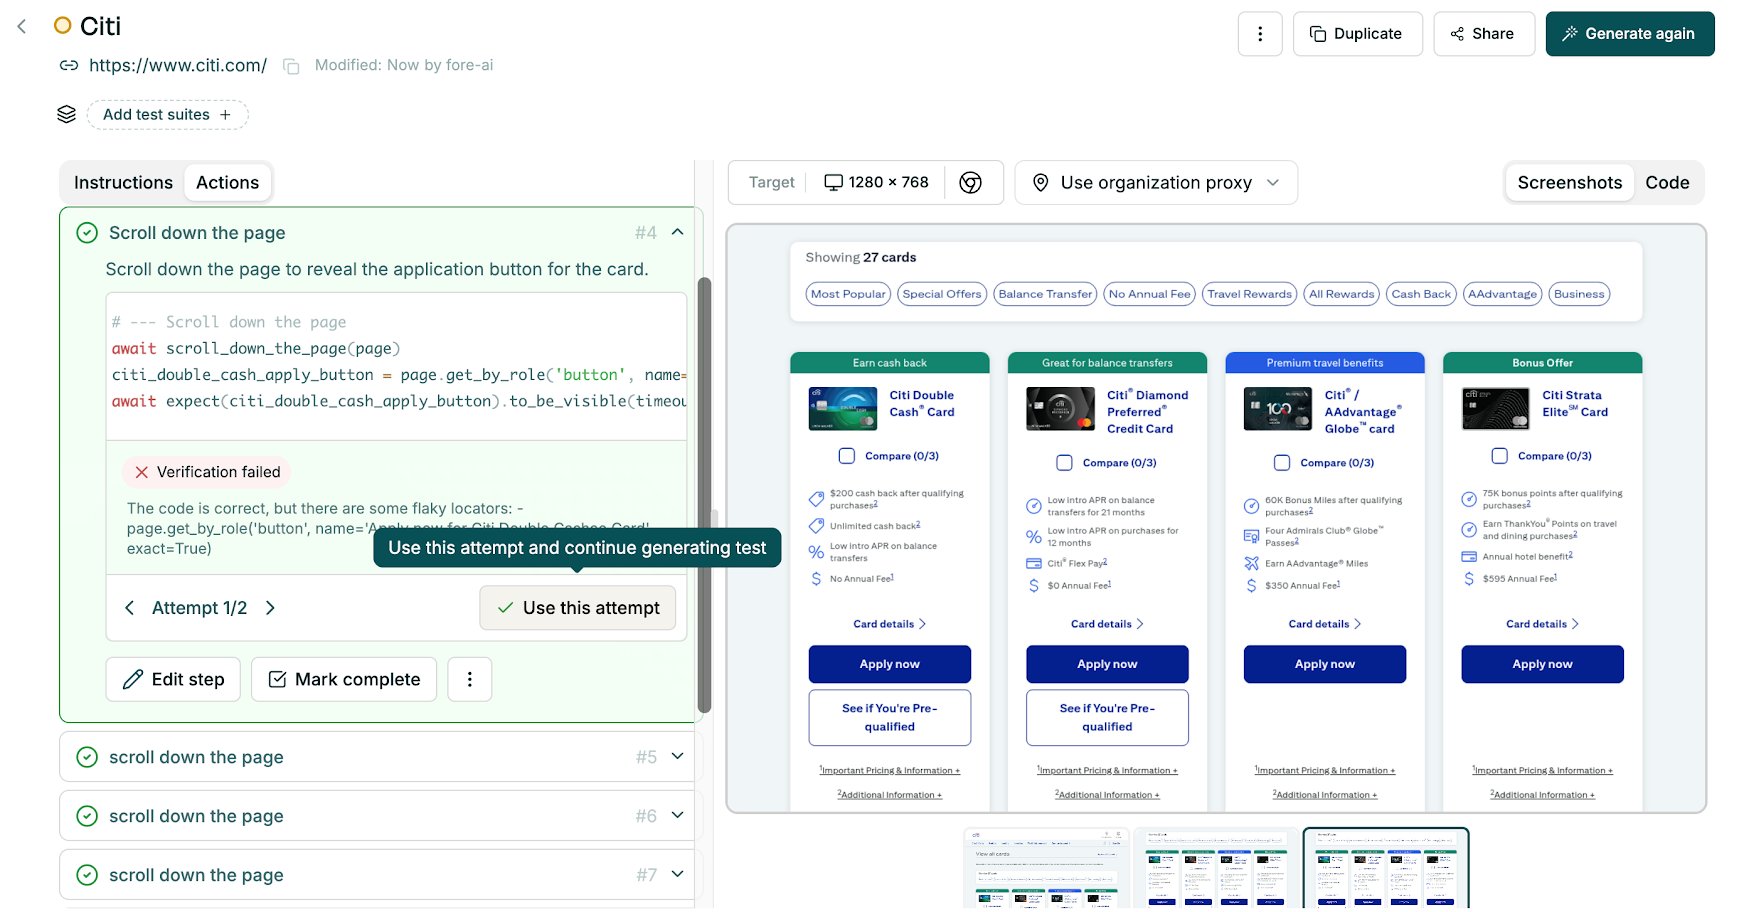
5. Override verification
If the agent's step verification failed, but you are certain the step outcome is correct, you can manually override the verification result.
6. Mark as complete
If the final steps are redundant or unnecessary, use the Mark complete button on an earlier step to end the test there. All following steps are permanently removed.
⚠️ This action is permanent — truncated steps cannot be restored.
7. Add more steps
After a test is confirmed complete, you can extend it by adding further actions at the end.
8. Delete a step
Expand a step's three-dot menu (⋯) and click Delete step to remove it from the script.
⚠️ This action is permanent. Deleting a critical step may break the test script and require a full regeneration. Use with caution.
9. Mark step as optional
Individual steps can be marked as optional, allowing the test to continue even if that step fails.
Running tests
Continue to the Running Tests Guide.